Spoiler Alert: Not my usual type of blog post.
I am putting this information out there… in hopes that whoever needs it will find it, and find it to be useful. We shouldn’t all have to learn everything the hard way.
So! Last Wednesday I painted three 6-panel doors...
So! Last Wednesday I painted three 6-panel doors...
(Today I did bathroom cabinet doors. I have finished the Guest Room and have moved onto the Guest Bath woodwork. Yay!)
So, on the doors. First I painted the panels, and then did the rails after that. And, ya know, it went pretty well doing it that way, separating them out like that.
I googled it, and even found the right order to paint the rails: inside verticals, then all the horizontals, and then the outside verticals. And it worked really well. (!)
Generally, my method is to slop some paint on the panel and first get it down in the corners real well. Then I slop some more all over the panel, and while it’s all nice and wet, I get down to the business of spreading the paint out evenly, removing the excess, and finishing all the strokes in the right direction.
You always want to finish vertical strokes by painting upwards. That smooths things out nicely and hides any evidence of placing a brush down.
The tricky part is… I have to remember to baby-sit them a little after painting one. And if I’m painting the next one, I have to remember to check back on the first one. You see, since I am painting doors on their hinges (with a brush), I have to worry about Gravity.
Sane people would remove the doors and spray them, but not me. Hahaha! Noooo, that would be too easy. Nope, I couldn't get the door on or off. I have enough trouble with doorknobs. So I just use a brush and do my Zen thing.
And ditto for walls. Yikes, I tried rollers and paint trays, and finally just went back to my sweet, simple brush. It makes me happy.
(Walls are a piece o’cake, though, by comparison. To me, anyway.)
Anyway, like I said, after I paint a panel, I have to remember to check back on it a few minutes later and make sure there aren’t any drips or sags anywhere or any paint collected in a bottom corner. If there is, brush it smooth with your brush. If you wait too long, the paint is too dry to brush out, and the only way to remove a big, fat dried drip is with a razor blade and sand it afterwards. Gee, I wonder how I know that? Hahaha!
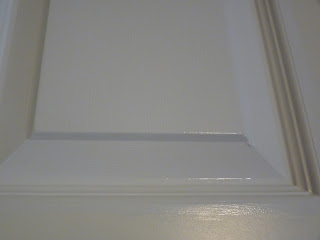 |
| Drip in right corner |
I have also learned that it’s better for me to decant some of my paint into a quart can (available for separate purchase), instead of using it out of the gallon can it came in. I can store the leftover touch-up paint in the same can later, so that’s a bonus. But using it out of the gallon has led to too much evaporating while I worked over time, and a ton of paint builds up on the side of the can, especially in the rim, preventing the lid from hammering down cleanly. And that leads to more evaporation and dried out paint. And paint’s expensive!
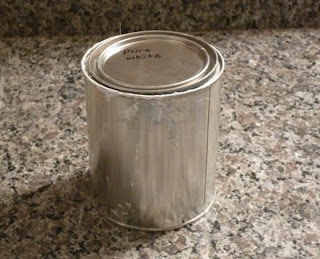 |
| Quart touch-up can |
Oh, and that has led me to another thing: Latex Extender:
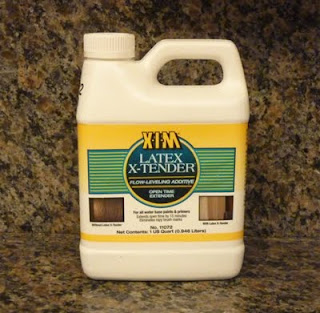 |
| Great for thinning paint |
It’s like thinner, and I use it to make thick paint thinner. Duh. But don’t add too much at first. You don’t want runny paint. Just start with a little and stir it in well with your free paint stick, repeating if necessary. That has really worked for me. In fact, the other day I used paint that I bought in 2007. Yikes, I hate to admit that, but it worked!
Plus the extender also provides a longer “open” time, which is very helpful. (especially since I use latex and not oil)
The other really useful tip that I want to be sure to pass on isn’t original with me, of course. And it has to do with my brush. I’m too lazy and water-nutty (a whole ‘nother blog post in itself) to wash out my brush after each single painting session. So I store it wrapped in plastic wrap. That keeps it from drying out.
This works for a few days, but not indefinitely. Eventually it would dry out and your brush would be rock-hard and ruined. Again, I wonder how I would know that? :) But you can just cheat for a little while with the plastic wrap.
Although…. You know what? The other day I knew that my brush would be too dried out by the time I used it again, so I unwrapped it and used it with some paint--just a few strokes, not much-- to juice it up again and then I wrapped it back up. And it was still nice and pliable when I used it a few days later. So there’s even a little way to get around that problem.
Eventually, though, you just have to wash the brush out. The brush gets a little over-saturated anyway. (Although I have been know to remove excess paint with a putty knife.)
Brushes are pricey, anyway. Or at least the ones I buy are. You get what you pay for when you buy brushes, whether they’re Kolinsky sable watercolor brushes or housepainting brushes. So you want to take care of them, and probably a lot more care than I give mine. I’m brutal with mine, I admit, the poor things.
But. I don’t hesitate to buy a new brush if I need one. After all, I’m saving tons of money painting myself, and the price of a new brush is nothing compared to paying a real painter. I use the 2” Purdy Syntox Angular brush. I may try their ClearCut next time, I don’t know.
Oh, and I don’t use tape or dropcloths. Not anymore. If I have to use tape, I buy the Frog kind. I'm not good at prep stuff like caulking the tape first and all that. I just use a steady hand, if I can get away with it.
I’ve just learned to cut in and do edges by doing. Basically, you press down on the brush until it’s spread out like a fan, and you only let a few bristles touch the edge and use arm motion to pull the stroke down the edge. You mainly get skillful at that by doing it, and even then, hopefully lucky.
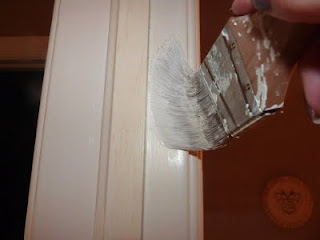 |
| Edging with a brush |
And I bought a tool at the paint store -- who knows what it’s really for, it says Sheetrock on it -- but I put it between the carpet and the baseboard to keep paint off the carpet. I just wasn’t so good at getting tape deep enough, so I gave up on it. (You want to wipe this off with a paper towel or rag fairly often.)
 |
| Tool I use for protecting the carpet. |
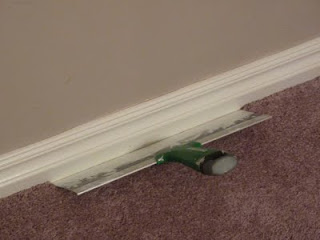 |
| I wedge it down in there to protect the carpet from paint. |
As for drop cloths, I’m usually pretty tidy and to my shame, I admit I gamble: I don’t use 'em. Now, every once in a while I have gambled and lost, and had a paint drop land on the carpet. So I've learned the best way to remove paint from carpet. And it only works if it’s still wet. You flush it with water first, and then dab it up with a paper towel. Repeat until it’s gone.
Ooh, one time, in our first house, I really blew it and knocked over a whole can of paint! Fortunately Mr. Man was at home, and he got the wet/dry vac while I flooded the carpet with water. But it worked, thank heavens! Same principle. You, though, will use a drop cloth like a rational, smart person, I’m sure.
And another thing: texture. Some times because of the wall’s texture you miss spots that you don’t see until the next day when it’s dry. Just go back and touch it up. And frankly, afterwards, fix anything else that’s not "just right". It’s just part of the process. I’ve learned to view it as the final step.
What else? I use Sherwin-Williams Pro-Classic for my woodwork, and it’s excellent. Closest to oil out there, but with easy latex clean-up.
And for cleaning the paint off my hands after painting all day, I use Dirtex. It is excellent. The bottle doesn’t really say that it’s for this purpose, but an employee at Sherwin-Williams put me onto it. Before I used Dirtex, I scrubbed my paws with a wicked kitchen scrubby. Dirtex is much easier.
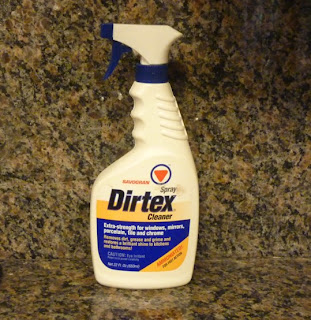 |
| Great for taking paint off hands. |
Sooooo… While I don’t really enjoy painting woodwork, I do love the results. You see, the main reason my woodwork project is a bit frustrating, is because I am painting bright, fresh white on top of dull, older, yellowed off-white. And there just isn’t a huge enough difference in the two colors to make it easy to see where I’ve been. So I’m constantly tilting my head, trying to catch the light and see where it’s wet.
Now, the After is gorgeous compared to the Before, but the During is a little frustrating. Oh well. At least I’m not having to paint any ceilings!
XOXO,
Lucky Dog
♥
♥


No comments:
Post a Comment